And the van is finished. Or at least usable. We’ve had one very successful overnight expedition in the van already up in the Brindabellas just west of Canberra. I’m hoping people have been following our Instagram for updates to the build process (@tallblackvan). If not, this post should give a quick run down of what has happened since work started on 22 November 2016, which was when the first cuts of wood were made and which I’m claiming is the beginning of the build.
So how to build a non-permanent bed platform for a Mitsubishi Delica? Start with 2 sheets of plywood (2400x1200mm). I used 19mm ply which was total overkill and very heavy. It makes for a sturdy platform though. I was worried that the 570mm gap over the fridge would flex with thinner ply. If you get your ply from a hardware store, get them to make a few cuts in each sheet. From one sheet, you want two 1200×1000 sections for the top and bottom. Conveniently, the Delica is exactly 1m between the rear wheel wells, and 1.2 metres is just enough to almost reach the middle row of seats. From the other sheet, you want four 1200×500 sections. Three of these will be trimmed by a few cm to make up the length ways central supports (depending on how tall your fridge is), while the fourth will be used for cross sections. Both sheets will have 400×1200 extra bits that get trimmed to follow the contours of the van sides and get put on hinges. You can try having one big panel for top, but you’ll have difficultly getting it through the narrow rear door.
If you’ve followed these instructions, you can rest everything together to get a feel of how things will look without even making a cut yourself – something like this:

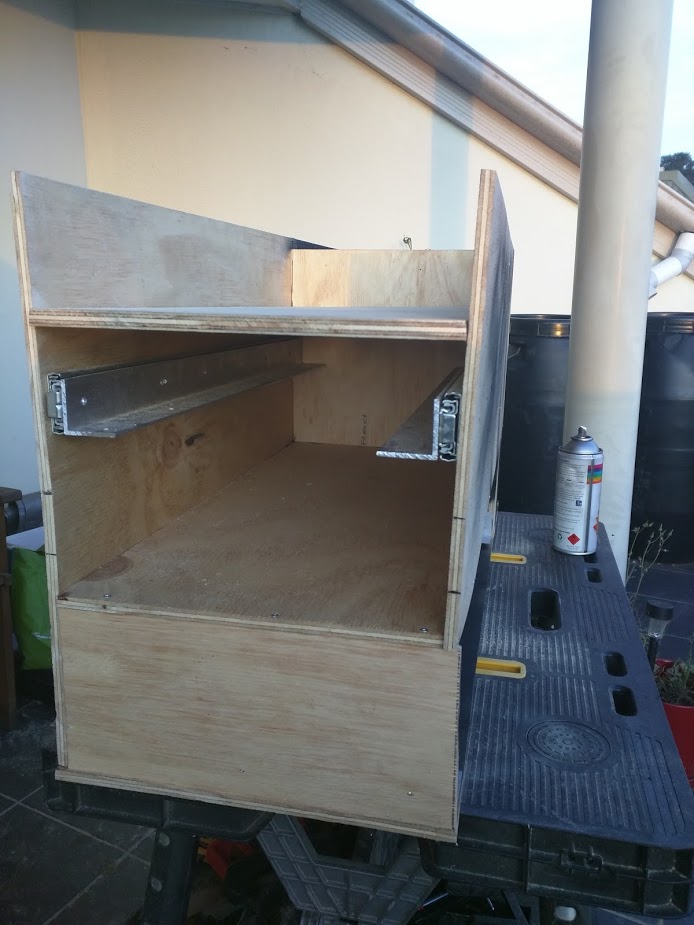
As you can see from the photo, because I choose the 430mm high ARB fridge, the 500mm high sides left some wasted space – about 30mm. Because the entire idea behind buying the expensive fridge was to preserve as much head room as possible, I ended up trimming the sides for a more snug fit. The fridge slide is Huntsman brand bought off eBay. It’s aluminium, but still about 16kg all up. Really good quality, highly recommended. With the fridge taking up 570mm across, and the thick ply taking another 57mm, AND the drawer slides taking another 38mm, the horizontal drawer space was a lot skinnier that I expected. It was still wide enough to take the butane cooker though, which is really all I need to work from.
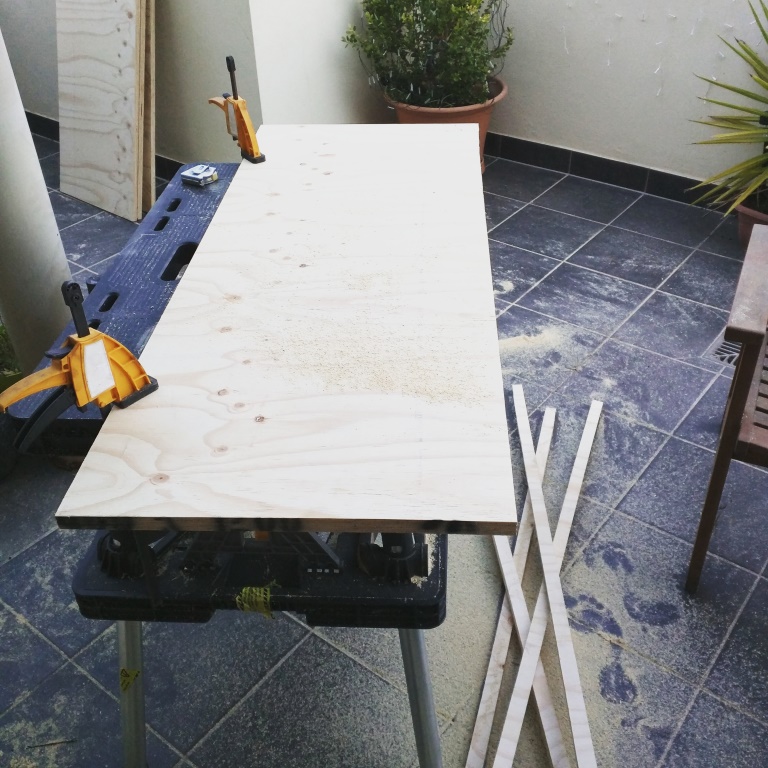
In this photo you can see my entire ‘workspace’. Living in an apartment, options were limited. Fortunately the balcony is reasonably large, but it’s not the most ideal space. Can’t wait until I get a house with a proper shed.


The fridge slide was attached to the base of the platform using T-nuts or ‘nutserts’. You drill a hole in the wood, push the pointy bit in the bottom and then hammer in the wings so it cannot move. The only problem I had with this stage was actually getting the T-nuts. Bunnings only sells imperial sizes for some completely unknown reason, so the bolts you see there are the only imperial bolts in the entire build (1/2″ from memory, but not sure).

This photo shows the 90-degree clamps that I used throughout the build. Very handy and a must for almost any cabinet making. I’m glad I found out about these.

After some time, it ended up looking like this. I’m not a fan of wood grain, which is why I quickly gave most of the areas a spray with a cheap black spaypaint I had already ($1 from Supercheap Auto, I knew they’d come in handy). You can see the back areas in the above photo which are to be used for the battery and other electrical equipment. The goal is to have all the kitchen and electrics on a single platform, so that in the event we put the middle seats back in we still have a working kitchen/fridge area with storage on top. It also makes removing and re-installing the unit much simpler when we need all 7 seats back in. That think piece of wood across the top in the above photo was just for rigidity while working on this section without the top anchoring everything.
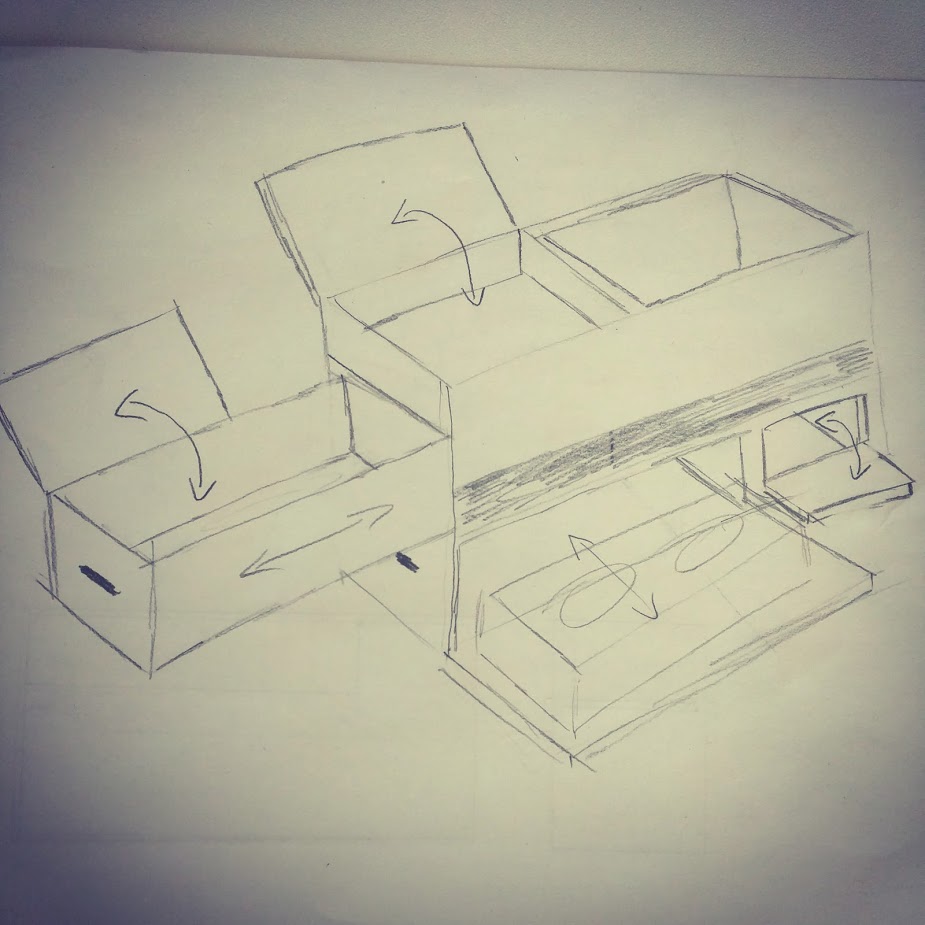
The drawer system next to the fridge needed to do a lot of things and went through a lot of revisions. I used one 9mm sheet of ply for almost the entire thing I think. Some of the design requirements were that the stove needed to be at a good height to cook at for both myself and Rosie – the van floor is 850mm from the ground, and with most kitchen benchtops recommended at 850-900mm, that meant the stove had to go on the bottom. This pushed the slides up from the bottom of the drawers to just above the stove, which messed with the original plan to have a pull out cutting board on the bottom. Eventually the diagram above seemed close enough to work, although proportions got modified as I was working. The top hinged cabinet top never eventuated due a slight issue with my calculations (I forgot to factor in 9mm of material somewhere), but it worked out well as that section is not just a big open storage space for plates and bowls.

These are the 227kg 915mm long drawer slides I got from eBay for the side drawer system. They were a bit of a pain to fit – ideally you need counter sunk M8 bolts going into T-nuts, but with Bunnings only having imperial T-nuts, I just ran the bolts all the way through. The nuts on the other side don’t foul on anything fortunately. The other issue is that tolerances with bolt head size is very very slim as the slide mechanism needs to pass over them. Not all counter-sunk bolts are the same, and the two types I tried wouldn’t initially countersink into the holes initially, despite being the correct size. I had to drill out a bit of material in the slides and use select holes that didn’t catch rather than just straightforwardly using every provide hole. Still, once attached these slide are incredibly sturdy and able to hold my weight at full extension easily. I went with these heavy duty slides as they take up the same width as the smaller slides and there may be a time where I need to reuse them someday for a future modification (such as a custom fridge slide for larger fridge or slide out platform section), so the more weight they can can carry the better.
You can see the drawer system taking place in the above photos, and the smaller drawer slides I used for the cooker section and the slide out chopping board/cutlery drawer. These drawers are basic 47kg 300mm and 600mm slides from Bunnings with a push to open function. Aluminium angle sections were riveted to the slides, which was my first time using rivets. They’re very simple to use and if I’d known that I may have considered making the entire platform out of rivets and aluminium square section to lighten things considerably. One of the Bunnings push to open springs broke almost immediately due to plastic components wearing in the slides, so I removed the spring and just pull out the cutlery draw with a handle now.

The cutlery drawer was cut from 9mm MDF just to mix things up, with a piano hinge on one side for the cutting board.
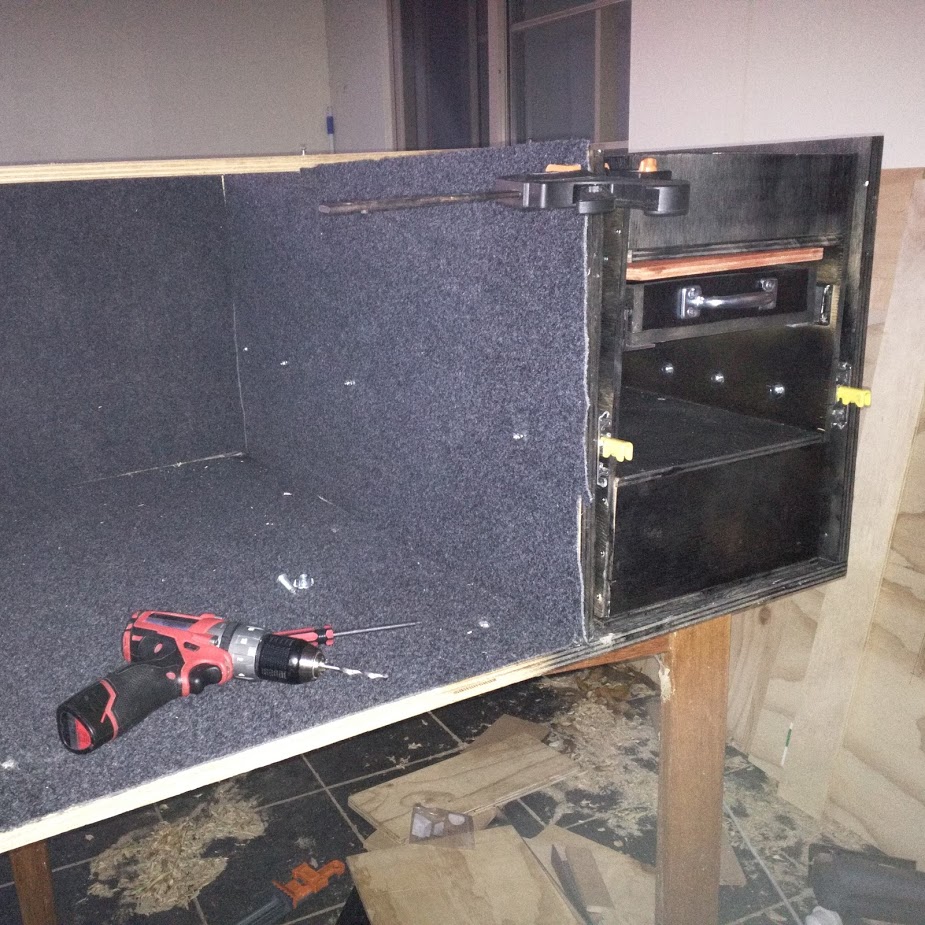
I carpeted in the fridge area to try muffle any noise that would keep us awake from the fridge. I’m not sure if this was necessary due to the 19mm ply and 120mm foam mattress also separating the sleeping area from the fridge section, but it makes it look nice as well. Carpet was automotive stuff from Bunnings – they were cheaper than anything online I could find. By the way, that little Milwaukee 12v drill did almost all of this build – highly recommended.

And above you can see the final put together basic platform. All up, because of the ply, it probably weighs over 100kgs. I had to get a friend help me move it downstairs to the van for the rest of the build. It’s very solid though. You can see how bad some of my cuts were, particularly on the drawer system. The circular saw guide I bought was close to useless, so every so often I’d be off by a millimeter or two in some places. It’s all glued and screwed together though and does its job. Remember, if it looks stupid, but works, it’s not stupid.
The steps after this were test fitting in the van and installing the side panels, and the more lightweight forward section to hold the rest of the platform. I’ll hopefully have some pictures of that shortly.